Raspberry Pi: Enable USB boot
The most common way to boot a Raspberry Pi is usually to use an SD card, however, in some cases it may be useful to boot a Raspberry Pi from a USB instead of the traditional SD card.
To do this, we must load a Bootloader to our Raspberry through an SD card, the simplest way to do this is to use Raspberry Pi Imager which you can download from the official website or install with apt install rpi-imager if you use Ubuntu or other Debian based system.
The interface is quite simple and intuitive:

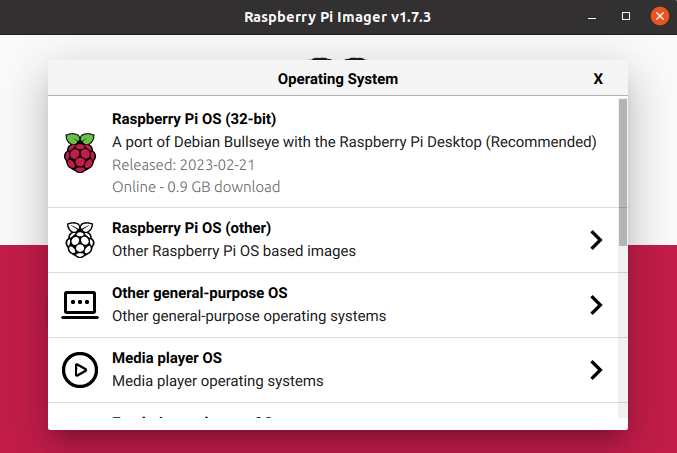
To start we must select the CHOOSE OS option and the following menu will open:
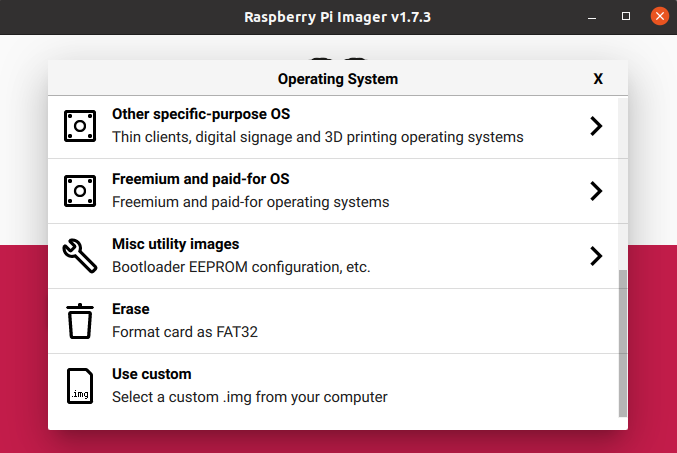
Here we must find and select the Misc utility images option:
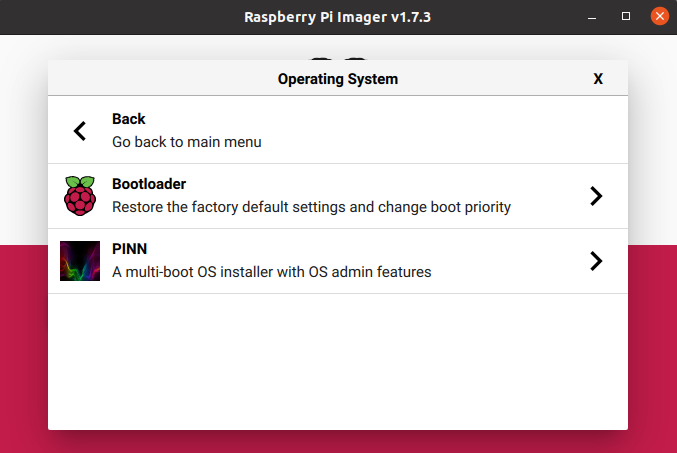
Next we select the Bootloader option:
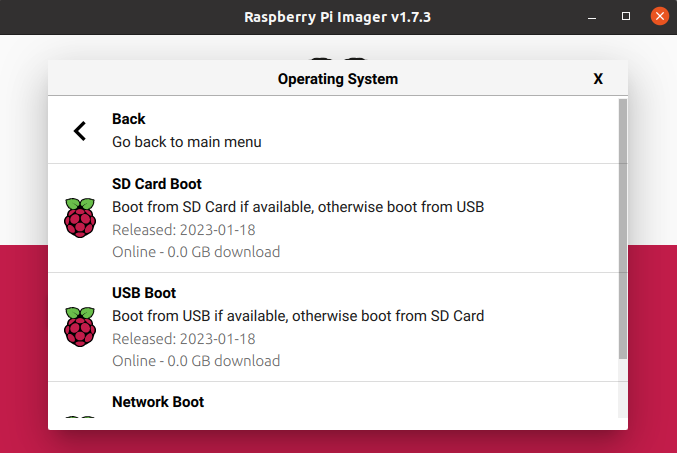
Once here we can select the different Bootloaders available, in this case we want to enable the boot opr USB so we will select the USB Boot option.
Once this is done, the Operating System section will show USB BOOT as selected and we can proceed to select the storage where to save the image:
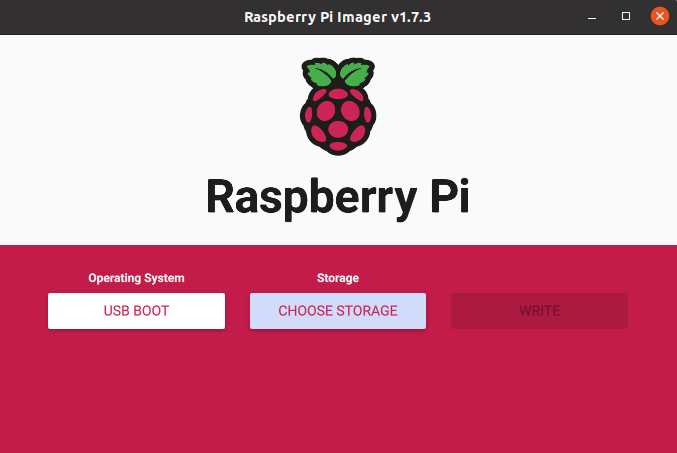
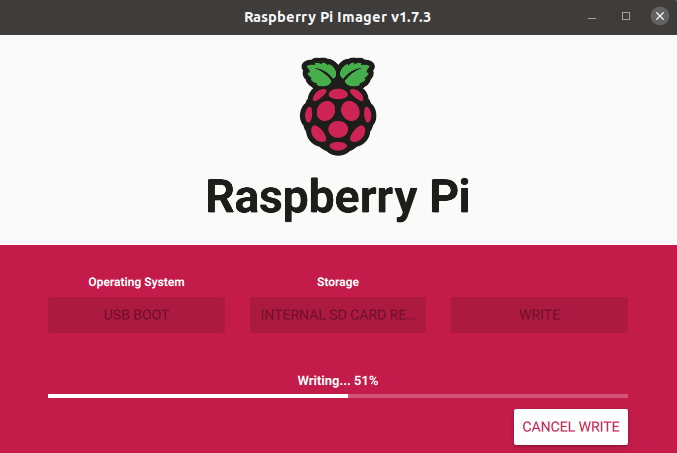
Once both the Operating System and Storage options are selected, we can proceed to select WRITE to save the bootloader to the SD card. Once this is done, we will have to wait until the image writing and verification process is finished.
Once finished, the following message should appear:
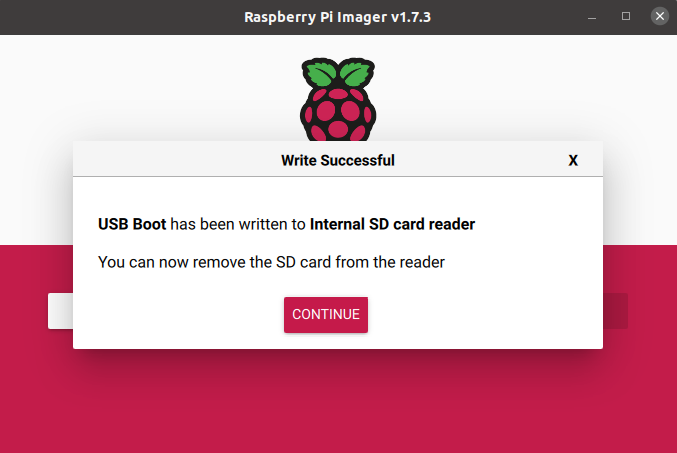
Now we simply put the SD card in the Raspberry Pi and connect it to the power supply. Nothing else is needed, just wait a minute or two until a green light starts blinking periodically. This means that the new bootloader firmware has been successfully flashed on our raspberry and we can remove the SD card and boot the Raspberry from an USB drive.